Every construction site depends on equipment that works when you need it. Your concrete mixer sits at the heart of countless projects, turning raw materials into the foundation of buildings, sidewalks, and infrastructure. When it fails, everything stops.
Regular maintenance of your concrete mixer directly impacts jobsite productivity, safety, and mix quality. A well-maintained mixer delivers consistent concrete strength batch after batch. A neglected one creates unpredictable results, dangerous operating conditions, and frustrating delays that throw your entire schedule off track.
Poor maintenance leads to downtime that costs you money every hour the machine sits idle. You’ll face costly repairs that could have been avoided with simple daily care. Inconsistent concrete quality means rejected loads and rework. Project delays compound quickly when your mixer needs emergency service.
This comprehensive guide focuses on practical, day-to-day maintenance basics any operator can follow. Whether you run a small contracting operation, manage a rental yard, or oversee heavy machinery on large construction projects, these maintenance tips will help you keep your equipment running smoothly.
What this guide covers:
- Daily care and cleaning procedures
- Component inspections and lubrication schedules
- Managing wear parts and concrete build-up
- Safe operation and load management
- Storage, seasonal preparation, and record-keeping
Introduction to Concrete Mixers
Concrete mixers are indispensable on any construction site, serving as the backbone for producing high-quality concrete by thoroughly combining cement, water, and aggregates. The efficiency and reliability of these machines directly influence the pace and quality of construction projects, as well as overall operating costs. Proper maintenance of concrete mixers is essential, not only does it keep equipment running smoothly, but it also helps prevent potential safety hazards and ensures consistent concrete quality. This comprehensive guide will walk you through the importance of maintenance, essential pre-maintenance checks, the value of operator training, and how to troubleshoot common issues. By understanding and applying these maintenance fundamentals, you can maximize the performance and lifespan of your concrete mixers, safeguard your team, and deliver superior results on every project.
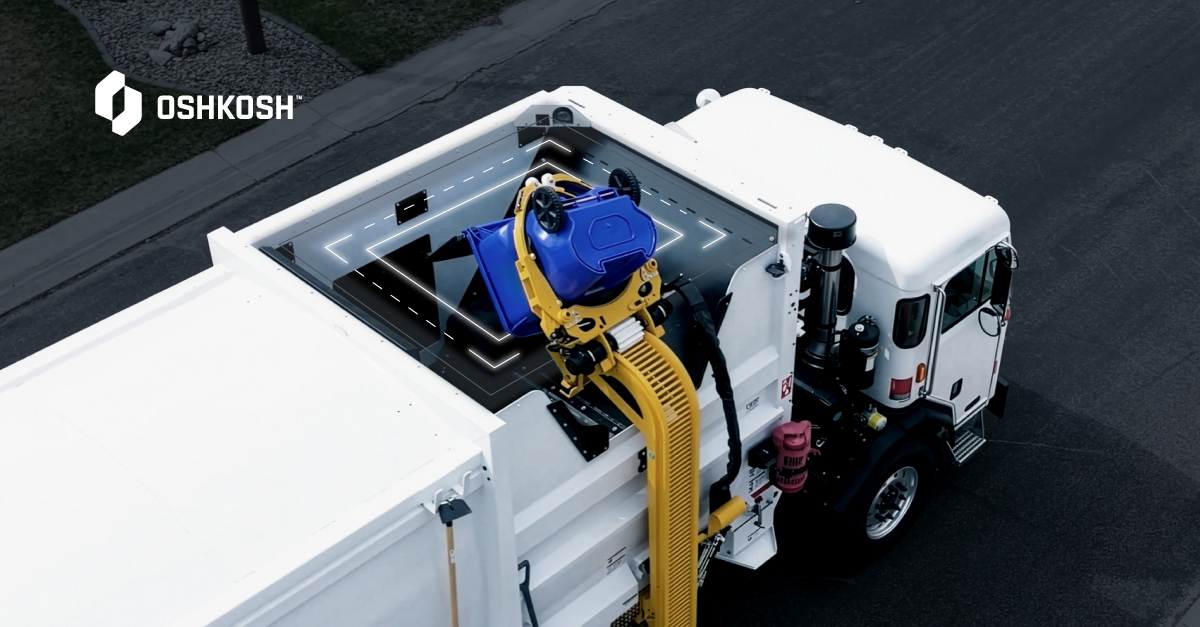
Understanding Key Concrete Mixer Components
Knowing the main components of your concrete mixer helps you spot early wear and plan maintenance before small problems become expensive breakdowns. When you understand how each part functions, you can quickly identify when something isn’t working correctly.
Critical components include:
- Mixing drum: The rotating vessel where concrete mixing actually happens. The drum’s condition directly affects mix consistency and capacity.
- Mixing blades/paddles: These internal fins lift and tumble materials to create a uniform mix. Blade angle and condition determine mixing efficiency.
- Drive motor: Powers the drum rotation. Can be electric or gas-powered depending on your mixer type.
- Gearbox/reducer: Transfers motor power to the drum at the correct speed and torque.
- Bearings: Enable smooth rotation of the drum and other moving parts while supporting heavy loads.
- Seals: Prevent contaminants like dust and moisture from entering critical components while keeping lubricating oil and slurry contained.
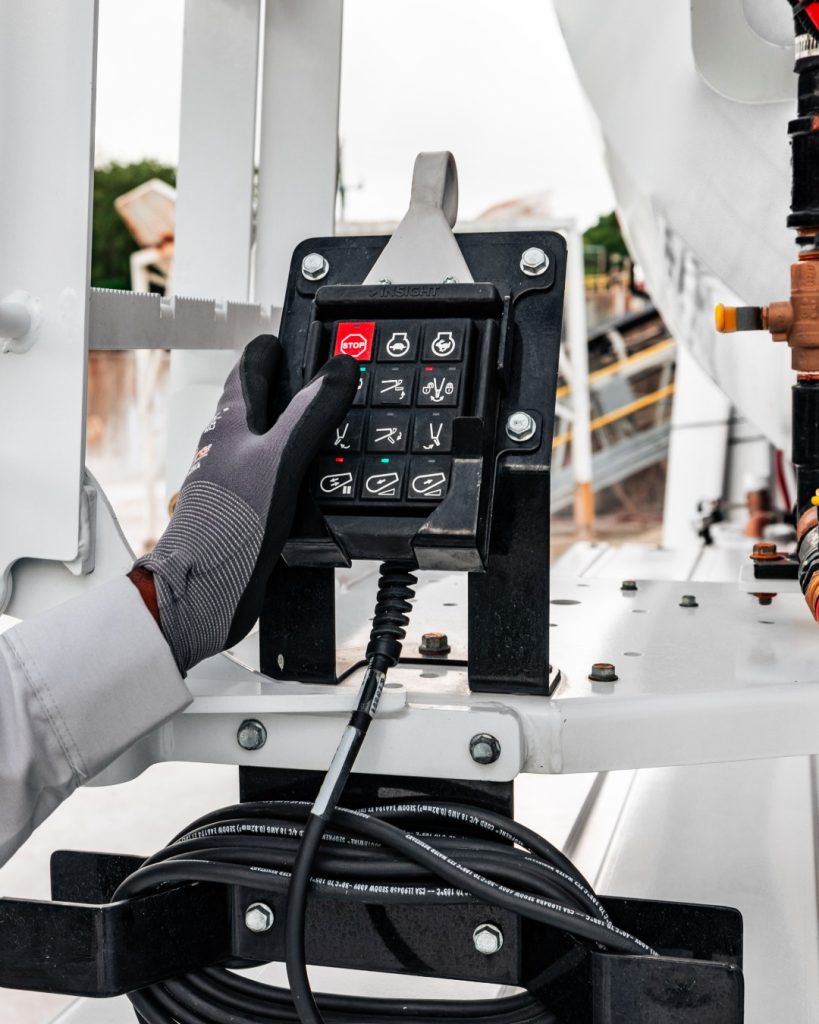
- Control panel: Houses switches, electrical components, and safety controls for the power supply and operation.
Each component contributes to consistent mixing. The drum rotation speed must match the mix design requirements. Properly angled mixing blades ensure materials move correctly through the drum. Sealed bearings protect against the constant friction and abrasive materials that would otherwise destroy internal components rapidly.
Parts that typically wear first include the mixing blades, drum liners, seals, and bearings. These components face direct contact with abrasive concrete materials and experience wear and tear during every operating cycle. Routine checks of these items catch problems early.
How Mixers Fail When Maintenance Is Neglected
Understanding common failure patterns helps you recognize warning signs before they become catastrophic. Most mixer failures trace back to skipped maintenance tasks that seemed minor at the time.
Hardened concrete build-up inside the drum happens when operators skip timely cleaning after each pour. Remaining concrete sets up inside, reducing drum capacity, adding motor strain, and throwing the drum out of balance. Eventually, you’re chipping out rock-hard deposits instead of mixing fresh material.
Seized bearings result from inadequate lubrication or contamination. When dust, cement slurry, or moisture penetrates bearing housings, the constant friction destroys them. What starts as unusual noises becomes a locked-up drum that won’t rotate.
Burnt motors often follow overloading or running the mixer with excessive buildup. The motor works harder than designed, experiences temperature rise beyond safe limits, and eventually fails completely.
Cracked drums develop from impact damage, metal fatigue, or thermal stress. Operating a cracked drum creates serious safety concerns and potential safety hazards for everyone nearby.
Leaking gearboxes indicate worn seals, overfilled oil levels, or internal damage. Lubricating oil escaping means metal components inside are grinding against each other without protection.
Real-world consequences include emergency shutdowns during critical pours, rejected concrete loads that waste materials and time, hours of labor spent chipping out hardened material, and expensive part replacement that proper maintenance would have prevented.
Spotting early signs gives you time to fix low-cost problems.
Importance of Maintenance
Regular maintenance is a crucial step in keeping your concrete mixer in good shape and ensuring it delivers reliable performance batch after batch. Without proper maintenance, critical components like mixing blades and drum liners can suffer from excessive wear, leading to hardened concrete buildup and reduced mixing efficiency. These issues not only compromise concrete quality but also result in costly repairs and unexpected downtime.
When following proven maintenance tips and adhering to the manufacturer’s recommendations, operators can prevent corrosion, minimize wear and tear, and extend the life of their equipment. Routine inspections and timely replacement of wear parts help maintain safety standards and keep your mixer operating at peak efficiency. Ultimately, investing in regular maintenance is the best way to avoid increased wear, maintain high-quality concrete output, and protect your investment from expensive breakdowns.
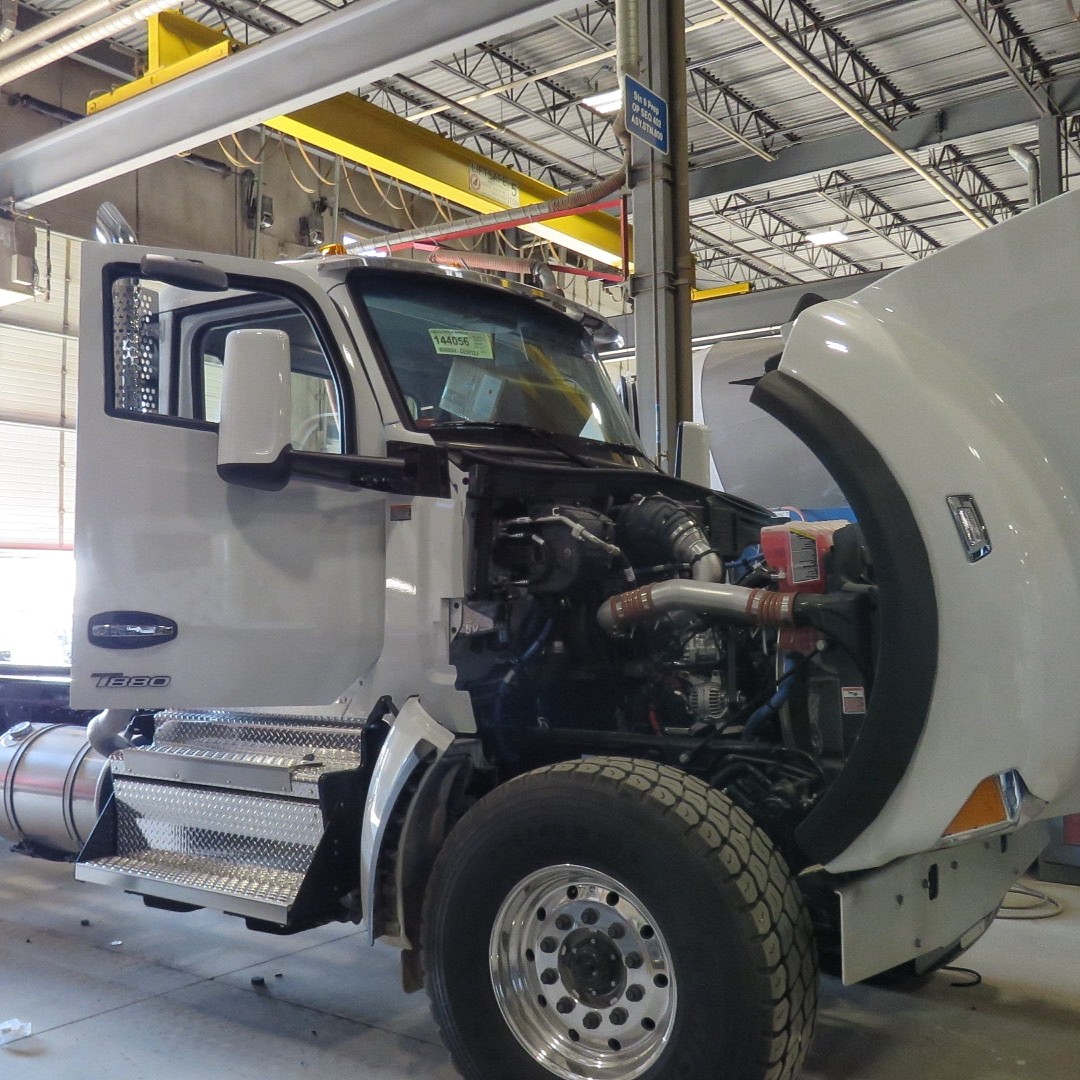
Pre-Maintenance Checks
Before starting any maintenance work on your concrete mixer, it’s essential to perform thorough pre-maintenance checks to ensure both safety and effectiveness. Begin by regularly inspecting the mixer drum, mixing blades, and discharge chute for any signs of wear and tear, such as cracks, thinning, or buildup.
Check the oil level and all lubrication points to confirm they are adequately serviced, and examine electrical components for any visible damage or loose connections. Always verify that the power supply is completely turned off before beginning maintenance, and use personal protective equipment like gloves, safety glasses, and sturdy footwear to guard against potential safety hazards. These simple but critical steps help operators identify issues early, protect vital components, and create a safer environment for everyone working with or around the mixer.
Daily Maintenance Checklist (After Every Use)
Daily routines are the fastest way to protect a concrete mixer. These tasks should be completed immediately after each pour while concrete is still wet and easy to remove. Waiting even a few hours dramatically increases the difficulty of cleaning.
A practical end-of-shift checklist takes about 10-15 minutes and prevents hours of difficult work later:
- Power off the mixer and engage any lockout devices before approaching moving parts
- Remove large chunks of remaining concrete from the drum, chute, and exterior surfaces
- Rinse the drum, discharge chute, and blades with clean water while material is still fresh
- Check the exterior for concrete splatter and rinse before it sets
- Visually inspect for obvious damage, loose bolts, or leaks
- Confirm the mixer is positioned safely for storage or next use
- Note any issues in your maintenance log for follow-up
Safety during daily maintenance requires attention. Never reach inside a rotating drum. Always confirm the power source is disconnected. Wear personal protective equipment including gloves, safety glasses, and waterproof boots. Concrete is caustic and will damage skin with prolonged contact.
Setting a fixed time target of 10-15 minutes makes the daily routine realistic and repeatable even on busy jobs. When crews know exactly what’s expected and how long it takes, compliance improves dramatically.
Daily Cleaning Routine
Daily cleaning while concrete is still fresh prevents the expensive, time-consuming removal of hardened deposits later. This crucial step takes minimal effort when done immediately but becomes a major project when delayed.
Start by filling the drum about one-third full with clean water. Add several shovels of coarse gravel or aggregate, this acts as an abrasive scrubbing agent. Run the mixer for 10-15 minutes, tilting the drum to ensure the gravel scrubs all interior surfaces. The rotational force combined with the abrasive materials does the hard work for you.
Drain the slurry completely. Never dump concrete waste where it can contaminate storm drains or waterways. Rinse the drum interior thoroughly with a hose or high pressure washer, paying attention to areas where material tends to accumulate.
Clean the discharge chute inside and out. Concrete builds up in chute corners and transition areas. A quick rinse now prevents layered deposits that eventually restrict material flow.
Clear splash areas around the machine. Dried concrete splatter creates tripping hazards and can cause corrosion on unprotected metal surfaces. Applying protective coatings to vulnerable areas helps prevent corrosion over time.
Daily cleaning doubles as a visual inspection opportunity. While you’re close to the equipment, look for cracks, leaks, bent components, or anything that looks different from normal. Catching these early prevents bigger problems.
Routine Inspections and Lubrication
Regular inspections and proper lubrication keep moving parts from wearing prematurely. These practices help identify issues before they cause breakdowns and ensure safety for operators working around the equipment.
Quick checks should happen daily or weekly depending on usage intensity. More detailed inspections occur monthly or at fixed operating-hour intervals specified in the manufacturer’s recommendations.
Key items to inspect:
- Drum condition: Look for cracks, dents, or excessive wear patterns
- Mixing blades: Check that they’re securely fastened and not worn below minimum thickness
- Drive belts or chains: Check tension and look for fraying or damage
- Motor housing: Feel for unusual heat, listen for grinding sounds
- Electrical cables: Look for damaged insulation, exposed wiring, or loose connections
- Hydraulic hoses (if equipped): Check for leaks, bulges, or abrasion damage
- Protective guards: Confirm all safety covers are in place and secure
Typical wear signs that demand attention include loose fasteners that have worked free from vibration, unusual vibration patterns during operation, burnt smell near the motor indicating overheating, oil spots under the gearbox suggesting seal failure, and rusty or cracked welds on the frame.
Lubrication intervals and grease types must follow the manufacturer’s manual. Using the wrong lubricant can damage seals or fail to protect components adequately. Over-greasing can be just as harmful as neglect, excess grease attracts dirt, damages seals, and creates messy buildup.

Lubrication Best Practices
Cement mixers and concrete mixer trucks need lubrication at specific points to maintain smooth operation. Understanding where and how to apply lubricant prevents increased wear on critical components.
Common lubrication points include:
- Main drum bearings
- Pivot points on tilting frames
- Drive chains or open gears
- Wheel hubs on towable units
- Roller chains in the drive system
Before applying grease, wipe each lubrication point clean. Forcing grease into a dirty fitting pushes grit directly into bearings, causing the exact damage you’re trying to prevent. A clean rag and a few seconds of attention make a significant difference.
Create a simple lubrication log to keep maintenance organized. Record dates, which points were greased, how much lubricant was applied, and the operator’s initials. This documentation helps track patterns and ensures nothing gets missed when multiple people share equipment.
Environmental conditions affect lubricant selection. Cold weather requires lubricants that won’t thicken and fail to flow. Dusty conditions may require more frequent application. Wet sites demand water-resistant formulations. Check your operation and adjust accordingly.
Never lubricate moving parts while the mixer is running. Keep grease away from brake surfaces on towable units, contamination causes dangerous stopping failures. Avoid getting lubricant on belts, which causes slipping and premature deterioration.
Transmission oil requires attention on a longer schedule. Regularly check the oil level and condition, looking for clean oil rather than cloudy or contaminated fluid. Most manufacturers recommend lubricating oil replacement every 2 years or 4,000 operating hours, but always verify against your specific equipment manual.
Managing Wear Parts and Concrete Build-Up
Some mixer components are designed to wear out and must be replaced on schedule to maintain concrete quality and mixing efficiency. Understanding which parts need regular replacement helps you budget for maintenance and avoid unexpected failures.
Primary wear parts include:
- Mixing blades and paddles
- Drum liners
- Chute liners
- Seals and gaskets
- Bearing assemblies
Worn mixing blades change the mixing action inside the drum. Blades that have lost their proper profile, the recommended tilt angle of 30-35 degrees, can’t move materials efficiently. The result is weak or inconsistent concrete that takes longer to mix and may not meet specifications. Regularly inspect blade condition and replace when wear exceeds manufacturer limits.
Gradual concrete build-up creates problems beyond reduced drum capacity. Accumulated hardened material adds significant weight, straining the motor and drive system during every rotation. The uneven distribution throws the drum out of balance, creating vibration that accelerates wear on bearings and structural components.
Maintain simple measurement benchmarks to know when replacement is due. This might be minimum blade height measured from the drum surface, blade thickness at specific points, or visual reference marks. Document your measurements during inspections so you can track wear progression and predict replacement needs. Replacement intervals and procedures for wear parts should always follow the manufacturer’s recommendations to ensure optimal performance and equipment longevity.
Dealing with Hardened Concrete Deposits
When daily cleaning has been skipped and concrete has already set inside the drum, more aggressive removal methods become necessary. These methods require careful attention to safety and technique to avoid damaging equipment.
Mechanical removal works for moderate buildup. Use chisels, scaling hammers, or rotary hammers to break up deposits. Keep the mixer powered off and locked out during this work. Work carefully to avoid damaging the drum surface or mixing blades. Wear eye protection, concrete chips fly unpredictably.
Chemical removal helps with stubborn deposits. Commercial concrete dissolvers soften hardened material for easier removal. Some operators use white vinegar or mild acidic cleaners as alternatives. Apply according to product instructions, allow adequate time for the chemical to work, then scrub with a stiff-bristle brush and rinse thoroughly. Proper ventilation is essential when using any chemical cleaner.
Never use open flames or extreme heat to break up concrete deposits. High temperatures distort drum metal, damage seals, and can create safety hazards. The short-term convenience isn’t worth the long-term equipment damage.
The most important takeaway: preventing buildup through timely cleaning is always cheaper and safer than aggressive removal later. Every hour you delay cleaning after a pour makes the subsequent cleaning harder. Facilitate subsequent cleaning by never letting concrete fully cure inside the drum.
Safe Operation and Load Management
Safe operation connects directly to lower maintenance costs and longer mixer life. Equipment operated within design limits experiences less stress and fewer breakdowns than equipment that’s regularly pushed beyond capacity.
All operators must be properly trained on the specific mixer model they’ll use. Training should cover controls, emergency stop locations, rated capacity, and proper operating procedures. Ensure safety by never allowing untrained personnel to operate the equipment unsupervised.
Load management basics:
- Never exceed manufacturer’s volume or weight limits
- Reduce loads when working with stiff mixes or large aggregate sizes
- Account for water weight in total load calculations
- Avoid overloading even when schedule pressure mounts
Overloading strains the motor, gearbox, and frame simultaneously. The motor draws excessive current and overheats. Gearbox components experience forces beyond design specifications. Frame welds and connections fatigue faster. On uneven ground, an overloaded mixer becomes a tipping hazard.
Good operating habits extend equipment life. Always place the mixer on stable, level ground before operation. Use correct drum speed for different mix designs, faster isn’t always better. In hot conditions, avoid continuous operation without rest periods to allow motor cooling. Control equipment operation within specified parameters to maintain good shape over years of service.
Recognizing Early Warning Signs
Catching problems early prevents small issues from becoming major failures. Train operators to recognize symptoms that warrant immediate investigation rather than pushing through to complete a pour.
Warning signs requiring immediate attention:
- Grinding or knocking noises from the drive system
- Abnormal vibration during rotation
- Slow drum rotation compared to normal speed
- Tripped breakers or blown fuses
- Transmission gear noise that changes with load
- Unusual smells, especially burning odors near motor or gearbox
- Visible smoke or sparks from any component
When these symptoms appear, stop operation and investigate. Running through warning signs typically converts a minor repair into a major breakdown.
Safe checks operators can perform:
- Tightening accessible loose bolts
- Verifying electrical connections are secure
- Inspecting for obvious leaks or damage
- Confirming safety guards are in place
Know when to call a qualified technician. Electrical problems, internal gearbox issues, and structural damage require professional attention. Attempting repairs beyond your skill level creates safety hazards and can cause additional damage.
Document recurring symptoms in your maintenance records. If the same problem keeps appearing, there’s likely an underlying cause that simple fixes won’t address. Good documentation helps maintenance teams diagnose root causes rather than repeatedly treating symptoms.
Operator Training and Education
Proper training and ongoing education are fundamental for anyone operating or maintaining a concrete mixer. Operators should be thoroughly familiar with the manufacturer’s recommendations, including specific maintenance procedures and troubleshooting techniques. Comprehensive training ensures that operators understand the importance of regular maintenance, proper storage, and effective cleaning procedures, all of which help prevent corrosion and ensure safety on the job site.
Well-trained operators are better equipped to spot early warning signs, perform routine checks, and respond quickly to potential issues, reducing downtime and repair costs. By investing in operator education, construction sites can maintain high standards of concrete quality, keep equipment in top condition, and foster a culture of safety and efficiency throughout every phase of concrete mixing and equipment operation.
Long-Term Care: Storage, Seasonal Prep, and Records
Mixers need different care when idle for extended periods or transitioning between seasons. A unit stored improperly over winter can require significant repair work before spring startup.
Proper storage procedures:
- Clean mixer thoroughly inside and out before storage
- Drain all water from the drum, water tank, and any lines that could freeze
- Position the drum to prevent water accumulation
- Store in a dry, covered area on level ground when possible
- Protect electrical components from dust and moisture with appropriate covers
- Apply protective coatings to exposed metal surfaces to prevent corrosion
Seasonal checks prepare equipment for changing conditions. Before winter storage, verify anti-corrosion coatings are intact. On towable units, check tire pressure and condition, tires can develop flat spots or crack during extended storage. Inspect tow hitches and safety chains. Before spring startup, examine power cords for rodent damage, check all fluid levels, and test safety systems before putting the mixer back into regular service.
Maintain simple maintenance records tracking dates of cleanings, inspections, part replacements, and repairs. This documentation helps you track overall mixer health, predict upcoming maintenance needs, and demonstrate proper care if warranty claims arise. Records also help when selling equipment, documented maintenance history supports higher resale value.
Consistent long-term care pays dividends. Equipment that receives regular attention throughout its life delivers more reliable performance on construction projects, commands better resale value, and avoids the costly repairs that plague neglected machines.
Basic Maintenance Schedule Example
Organizing maintenance into predictable intervals transforms reactive emergency work into manageable, scheduled tasks. Here’s a framework you can adapt for your operation:
Daily (after each use):
- Clean drum, discharge chute, and blades while concrete is fresh
- Rinse exterior surfaces and clean mixer thoroughly
- Visual inspection for obvious damage or leaks
- Verify safety guards are in place
Weekly:
- Lubricate main bearings and pivot points per manufacturer specifications
- Check and tighten accessible fasteners on a regular basis
- Verify all safety systems function correctly
Monthly:
- Detailed inspection of mixing blades for excessive wear
- Check seal condition and look for leakage
- Inspect electrical components and connections
- Verify oil level in gearbox and check fluid condition
- Review maintenance log for patterns or recurring issues
Annually (or per manufacturer operating hour intervals):
- Change gearbox oil per manufacturer’s recommendations
- Replace worn seals and gaskets proactively
- Professional inspection of structural components
- Comprehensive electrical system check
- Replace any wear parts approaching end of service life
Adapt this schedule based on your specific operating conditions. A mixer running daily on a busy batching plant site needs more frequent attention than one used occasionally by a small contractor. Dusty, wet, or extreme temperature conditions accelerate wear and may require shortened service intervals.
Always cross-check any schedule against the official operation and maintenance manual supplied with your mixer. Manufacturers understand their equipment best and specify intervals based on engineering analysis and field experience.
A clear maintenance schedule means fewer surprises. Your concrete mixer stays in good shape, your operators stay safe, and your construction site stays productive. That’s the real goal of mastering concrete mixer maintenance basics, keeping your equipment ready to work whenever you need it.